Call to Arms and the Hero’s Satchel: a reward for filling the tank or healer slot
What Call to Arms is, how to earn a Hero’s Satchel and what is in it: 30–50 gold, level 60 materials, Patron Marks and a 2% frame.
When a Mythic+ key or a Mythic raid or world boss group is missing a tank or a healer, the empty role lights up with “📯 Call to Arms”: a reward for whoever rescues the group. Answer it, get accepted into that role, finish the key or bring down the Mythic boss — and you get a Hero’s Satchel: gold, crafting materials, Patron Marks and a small chance at the Call to Arms frame.
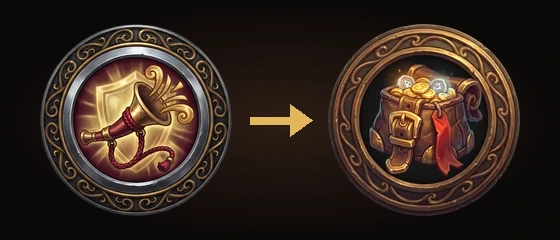
Where Call to Arms appears
- Only in chat group calls (how to post one) for a Mythic+ key (any key level) or a Mythic raid or world boss. Normal and Heroic runs have no Call to Arms: there, empty slots are filled by the world’s residents.
- Only on the tank and healer roles, and only while the slot is free. Once the role is taken, the Call goes out.
- On the group card that role gets a gold “📯 Call to Arms” tag, and under the card there is a line about the satchel with a “?” button: it opens the Hero’s Satchel window with every reward (including the materials for that exact place).
- Online heroes whose class can take that role and whose level fits receive a “📯 Call to Arms” card with a “To the group” button that opens the group chat and the role choice. A hero receives such a card at most once every half hour.
How to earn a Hero’s Satchel
- In the “Join as:” row (“Sign up” for a scheduled group), press the role with Call to Arms: tank or healer.
- The leader accepts your request or sign-up (or the group accepts automatically). From that moment your answer counts and waits for the result.
- Finish the key (timed or not, it doesn’t matter) or defeat a Mythic boss. In a raid the satchel comes for the first Mythic boss that falls after you were accepted.
- Do it within 6 hours of being accepted; after that the answer expires.
The satchel arrives on its own, in a separate pop-up “🎒 Hero’s Satchel for answering the Call to Arms (tank)…” listing what is inside.
What is in the Hero’s Satchel
| Reward | First of the day | Second and third of the day |
|---|---|---|
| Gold | 30–50 | 15–25 |
| Patron Marks | 5 | 3 |
| Level 60 crafting materials | as from the place’s boss (table below) | half, but at least 1 |
| Call to Arms frame | 2% chance | 2% chance |
- Full is only the first satchel of the day (the day starts at midnight Moscow time). The second and third are half. A fourth satchel on the same day is not given: the answer simply expires. The count is per account, not per hero.
- No gear and no extra loot roll: the satchel takes nothing from the group’s loot and doesn’t split it. You get your normal loot from the key or boss as usual; the satchel comes on top.
- Where things go: gold is a reward line like boss gold (claim it in Storage); materials go to your Pouch; Patron Marks are credited right away (spend them in the Patron Shop); the frame goes straight into your Collection, for every hero on the account.
Materials by place
Materials are rolled “as from the boss” of the place the group was called for (for a key, the dungeon’s last boss; for a raid, the Mythic boss that fell), at level 60 and without professions (no hides or herbs). A half satchel holds half the amount, but at least 1. A dash means that place adds no materials (gold, marks and the frame chance are the same everywhere).
| Place | Type | Full satchel | Half satchel |
|---|---|---|---|
| The Fiery Maw | Mythic+ key | Soul Dust ×1–2, Fel Shard ×1–2 | Soul Dust ×1, Fel Shard ×1 |
| Howling Caverns | Mythic+ key | Runecloth ×4–5 | Runecloth ×2–3 |
| The Deadmines | Mythic+ key | Runecloth ×4–5 | Runecloth ×2–3 |
| Duskshadow Keep | Mythic+ key | Runecloth ×4–5 | Runecloth ×2–3 |
| The Blackwood Depths | Mythic+ key | Raw Meat ×4–5, Bone ×1–2 | Raw Meat ×2–3, Bone ×1 |
| Lion's Stronghold Dungeons | Mythic+ key | Runecloth ×4–5 | Runecloth ×2–3 |
| Gearnid - The Flooded Gnomegrad | Mythic+ key | Runecloth ×4–5 | Runecloth ×2–3 |
| Quillspike — The Thorny Barrow | Mythic+ key | Runecloth ×4–5 | Runecloth ×2–3 |
| Scarlet Monastery — Graveyard and Library | Mythic+ key | Runecloth ×4–5 | Runecloth ×2–3 |
| Needledell — Barrow of the Dead | Mythic+ key | Soul Dust ×1–2, Bone ×1–2 | Soul Dust ×1, Bone ×1 |
| Crimson Sanctuary — Armory and Cathedral | Mythic+ key | Runecloth ×4–5 | Runecloth ×2–3 |
| Uldaman — Halls of the Creators | Mythic+ key | Thorium Ore ×2–3 | Thorium Ore ×1–2 |
| Zul'Karrak — Sanctum of Sands | Mythic+ key | Greater Magic Essence ×1–2 | Greater Magic Essence ×1 |
| Maraudon — Tomb of the Forest Princess | Mythic+ key | — | — |
| The Lost Temple of the Seven Stars | Mythic+ key | — | — |
| Blackforge Depths: I Detention Block | Mythic+ key | Runecloth ×4–5 | Runecloth ×2–3 |
| Blackforge Depths: II Forge and Workshops | Mythic+ key | Runecloth ×4–5 | Runecloth ×2–3 |
| Blackforge Depths: III Imperial Hall | Mythic+ key | Runecloth ×4–5 | Runecloth ×2–3 |
| Lower Spire of Cindermount | Mythic+ key | Runecloth ×4–5 | Runecloth ×2–3 |
| Upper Cindermount Spire | Mythic+ key | Dragon Scale ×1–2 | Dragon Scale ×1 |
| The Blighted Sanctum (East Wing — Prison of the Ancients) | Mythic+ key | — | — |
| The Dire Sanctum (West Wing — Corrupted Library) | Mythic+ key | Soul Dust ×1–2, Fel Shard ×1–2 | Soul Dust ×1, Fel Shard ×1 |
| The Dire Chamber (Northern Wing — Ogre Arena) | Mythic+ key | Runecloth ×4–5 | Runecloth ×2–3 |
| School of Dark Magic: I Students' Halls | Mythic+ key | Runecloth ×4–5 | Runecloth ×2–3 |
| School of Dark Magic: II Headmaster's Quarters | Mythic+ key | Runecloth ×4–5 | Runecloth ×2–3 |
| Fallen Stratholme: I Dead Side | Mythic+ key | Soul Dust ×1–2, Bone ×1–2 | Soul Dust ×1, Bone ×1 |
| Fallen Stratholme: II Living Side | Mythic+ key | Soul Dust ×1–2, Fel Shard ×1–2 | Soul Dust ×1, Fel Shard ×1 |
| Molten Core | Raid, Mythic | Greater Magic Essence ×1–2, Raw Meat ×4–5, Bone ×1–2, Thorium Ore ×2–3 | Greater Magic Essence ×1, Raw Meat ×2–3, Bone ×1, Thorium Ore ×1–2 |
| Lair of the Black Queen | Raid, Mythic | Dragon Scale ×1–2 | Dragon Scale ×1 |
| Crimsonwing Lair | Raid, Mythic | Dragon Scale ×1–2 | Dragon Scale ×1 |
| The Lost City of Zul-Garud | Raid, Mythic | Runecloth ×4–5, Raw Meat ×4–5, Bone ×1–2 | Runecloth ×2–3, Raw Meat ×2–3, Bone ×1 |
| Ruins of An-Kevash | Raid, Mythic | Chitin ×1–2 | Chitin ×1 |
| Temple of An-Kevash | Raid, Mythic | Chitin ×1–2 | Chitin ×1 |
| Kazzagar, Voidlord | World boss, Mythic | Soul Dust ×1–2, Fel Shard ×1–2 | Soul Dust ×1, Fel Shard ×1 |
| Azurex, Azure Warden of the Void | World boss, Mythic | Dragon Scale ×1–2 | Dragon Scale ×1 |
| Emerald Nightmares—The Four Fallen Dragons | World boss, Mythic | Dragon Scale ×1–2 | Dragon Scale ×1 |
Call to Arms frame
A golden frame with a herald’s horn, a defender’s shield and a healer’s bloom: the mark of one who answers when a group is missing a tank or a healer.
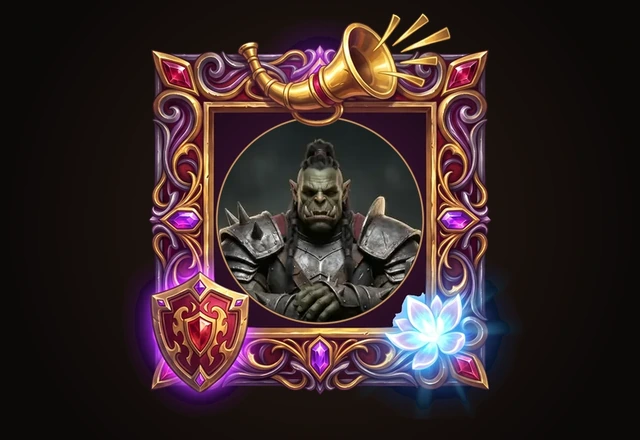
- It can drop from any satchel, full or half, with a 2% chance.
- The chance is rolled only while your account doesn’t have the frame yet: it never drops twice, there are no duplicates.
- It is not sold anywhere: only the Hero’s Satchel. Equip it in Collection → Frames. It’s looks only and never affects battle.
Guild call
A group leader in a guild can call their guild to an empty tank or healer role: the “📯 Guild call” button under the group card. The guild chat gets a line “📯 Guild call: … needs a tank”.
- A guildmate the leader accepts into that role within 3 hours of the call gets +5 guild seals (once per group, within the shared weekly seal limit).
- If it is a Mythic+ key or Mythic group, it also counts as answering Call to Arms: for the finished key or fallen boss they get a Hero’s Satchel too, by the same rules (day, half, 3 a day). Signing up for a scheduled group counts as well.
- One satchel per group: answering both through the group card and through the guild call still gives one satchel.
What doesn’t count
- Your own second account. A hero on the leader’s account, or one who logged in from the same address, doesn’t count (neither through the group card nor through the guild call). The satchel is for helping other players.
- A role where Call to Arms wasn’t lit: someone took it first, it’s a damage role, or the run is not a key or Mythic.
- An answer older than 6 hours, and a fourth satchel on the same day.
Read next
Party: up to five heroes, ready check and live combat
How to form a party of up to 5 heroes, what the leader does and how live party combat works: 60-second phases, the ready check, idle players, residents.
Guilds: founding, ranks and permissions
How to found a guild in Zarhold: free at any level, a name and one of 12 crests, five ranks and their rights, what only the leader can do, guild level up to 25.
Forming a group: roles and world residents
A party of 3 or 5 heroes, which roles each class can take, the “everyone or no one” rule and how world residents fill the empty spots.
Group loot rolls
How items are shared in a Dungeon: Need and Greed, a 1–100 roll, the time to choose, what world residents take and who gets a legendary.